Thermometer
This collection is empty
FAQ
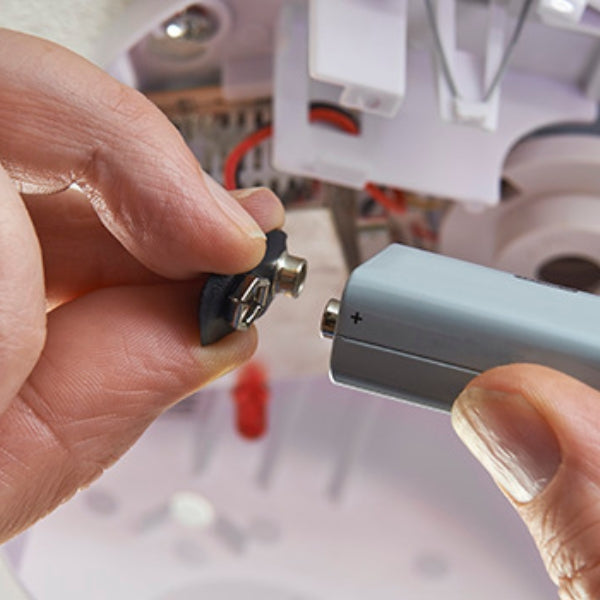
Ah, the classic thermometer battery conundrum! Fear not, intrepid temperature taker, for cracking open that stubborn casing is easier than you think. First, locate the tiny compartment on your device – it's usually hiding on the back or bottom. Grab a coin or a flathead screwdriver (your thumbnail works too if you're feeling brave), and gently pry open the cover. Voila! You've just performed minor surgery on your thermometer. Now, resist the urge to poke around too much – those delicate innards are best left undisturbed.
Ready to breathe new life into your trusty temperature teller? Let's get that old battery out and a fresh one in. Once you've popped open the compartment (see above for the thrilling details), carefully remove the old battery. Take note of which way it's facing – positive to positive, negative to negative. It's like a tiny electrical tango. Slide in the new battery, making sure it's snug but not forced. Close the compartment with a satisfying click, and bam! Your thermometer is back in action, ready to detect fevers and settle heating disputes.
The quest for the elusive thermometer battery can feel like a mythical treasure hunt. But fear not, dear seeker of power cells! Your local pharmacy is likely to stock these miniature marvels. Don't overlook electronics stores or even supermarkets – they often hide these batteries among their more popular cousins. Online marketplaces are treasure troves too, offering bulk buys for the truly prepared. And if all else fails, the thermometer manufacturer's website might just be your knight in shining armor, rescuing you from the depths of a powerless device.
Alright, DIY dynamo, it's time to perform some micro-maintenance on your temperature tool. First, channel your inner archaeologist and unearth that user manual (or Google it, we won't judge). Open the battery compartment – it's usually a twist-off cap or a slide-out tray. Remove the old battery, noting its orientation. Pop in the new one, matching the plus and minus symbols like a pro. Close it up, and give your thermometer a test run. If it springs to life, congratulations! You've just extended its lifespan and saved yourself from a chilly (or feverish) predicament.
In the world of thermometer power, not all batteries are created equal. Most digital thermometers crave the sweet, sweet juice of button cell batteries – typically LR41, CR2032, or SR41W. These little powerhouses pack a punch and keep your device ticking for months. But here's the kicker: always check your thermometer's manual or the old battery before making a swap. Using the wrong type is like trying to fuel a car with maple syrup – it just won't work. And remember, quality matters. Opt for reputable brands to avoid leaks and ensure accurate readings. Your health (and your thermometer) will thank you.
Ah, the million-dollar question! The lifespan of a thermometer battery is like a box of chocolates – you never know exactly what you're gonna get. On average, these tiny titans can power your device for anywhere from 1,000 to 4,000 hours of use. That's roughly 6 months to 2 years for the casual temperature taker. But here's the rub: factors like frequency of use, storage conditions, and even the brand of battery can influence its longevity. To maximize battery life, turn off your thermometer after each use and store it in a cool, dry place. And always keep a spare battery on hand – because Murphy's Law dictates your thermometer will die precisely when you need it most.